
{actually the wall was white, the stripes were grey, but that's less catchy}
I'm SO thrilled with how they turned out!!!
Here's a quick tutorial:
Measure the height of your wall and divide that number by the amount of stripes you want. I wanted big, bold stripes, and figured that would also mean less taping and precision, but smaller ones could look great too. I'm thinking smaller stripes though, would look best vertical.

Using a long, straight edge (I used a metal metre stick) and a level, draw lines in pencil. You'll need two people for this job. And a lot of patience. Then put painter's tape on your lines. And have a glass of wine, 'cause it's a long and arduous job!

Then paint! Apply one coat, wait 2 hours, and apply your second. Remove the tape 30 minutes after you apply your second coat.
Voila!


{Lily loves them, see?}
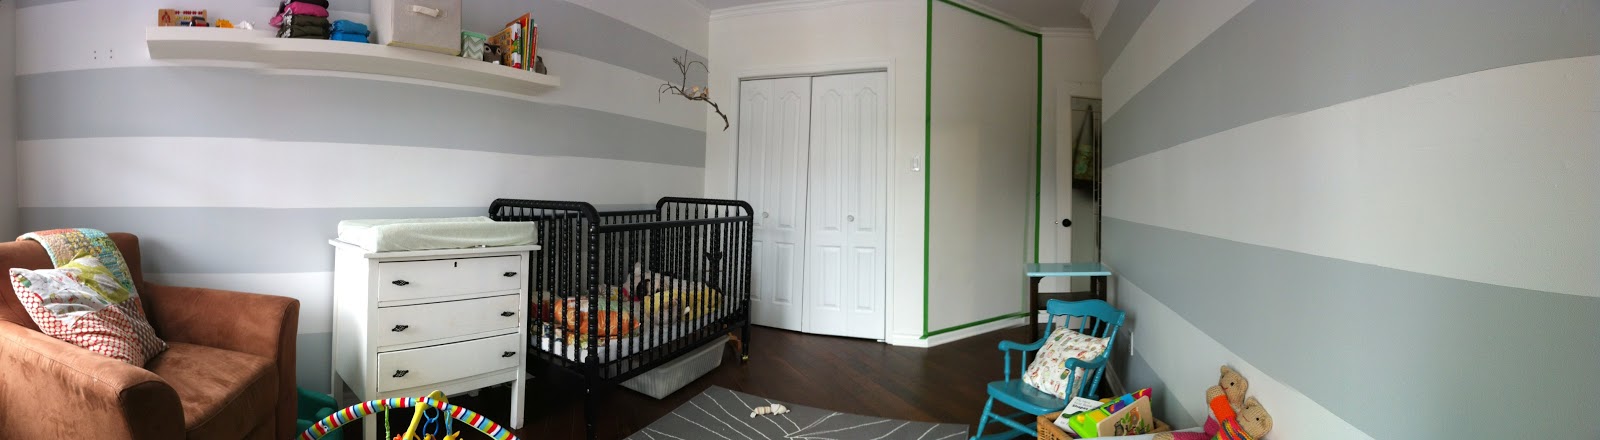
Here's a couple panoramic pics of the two walls we did. I promise you the lines are straight, but because of the panoramic app, then look a little disjointed. The one wall that still is taped will be a chalk board wall :)

Wow, this looks great!
ReplyDeleteEm its beautiful! Well done my dear :)
ReplyDeletenice!
ReplyDeletei love it, looks amazing em! major props!
ReplyDeleteThat's beautiful!
ReplyDeleteLove it Em! I instantly noticed the glass of wine on the shelf and giggled. I totally have a glass of wine beside me when I'm doing projects like this.
ReplyDeleteWow. I can't believe how good that looks! Amazing job baby. I should go away more often! (just kidding :-)
ReplyDeleteP.S. Who is that psycho in the crib and what have you done with my daughter?
Love the final look!! Great work!
ReplyDelete